Rock Art Around Las Vegas

Rock art is a precious resource. Please help protect and preserve these sites.
 Paiute Rock trailhead parking along Logan Canyon Road (view W) |
Overview The Mt. Irish Archeological District is a large area with many boulder piles and low bands of cliffs covered with petroglyphs. Paiute Rock is one of the major public petroglyph sites in the district and consists of one, isolated boulder pile (but the boulder pile is made up of many boulders). Native peoples etched an extensive array of nice petroglyphs onto all sides of the boulder pile. The BLM placed nine numbered markers around the site (some are now missing), and the BLM and Lincoln County each produced brochures describing the numbered petroglyph panels. While visiting this site, please take care of the area and leave it as you found it for the enjoyment of future generations. Link to Site Map. |
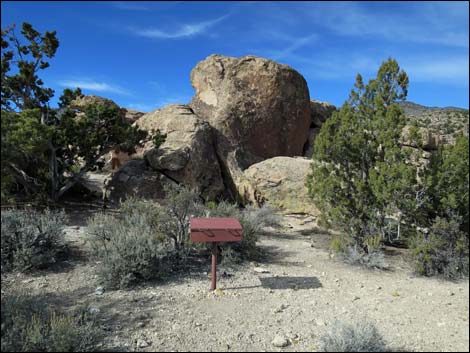 Paiute Rock sign-in register is adjacent to parking area (view NW) |
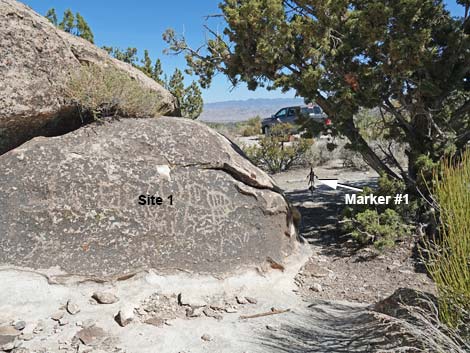
Location The Mt. Irish Archeological District is located in the Pahranagat Valley, about 110 miles north of Las Vegas. Details of the location, access routes, and GPS coordinates are presented on the Mt. Irish Archeological District page. On Logan Pass Road, stop at the large parking area marked by the second BLM Archeological district sign (Site 1134). The parking is located at the southeast corner of Paiute Rock. The sign-in register is located on the edge of the parking area, and the first numbered marker is behind the register. Markers 2 to 9 run to the right, circling Paiute Rock in a counter-clockwise direction (note that markers #2 and #9 are missing). |
 Marker #1 is behind the Sign-In Register (view W) |
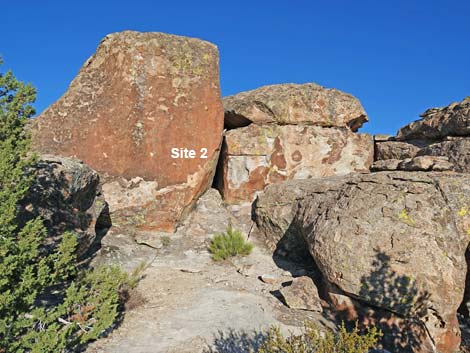
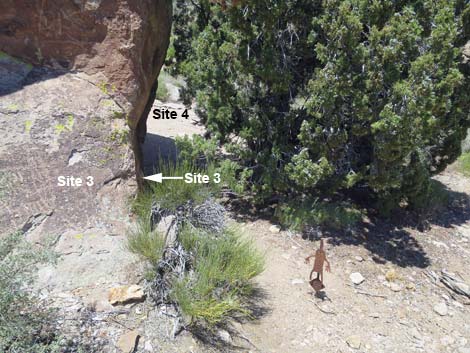
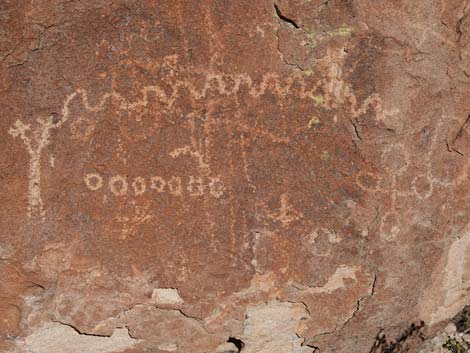
From Site 1 by the sign-in register, the trail runs north passing between juniper trees. In only a few yards, hikers arrive at Site 2, a cleft in the cliffs. The main features here include the Happy Family, on the back left wall, and the Sheep on a Plate on the upper right wall. Backing out of Site 2, there are several sheep on the corner of the cleft, and from that point, Marker #3 is just ahead. Site 3 is a collection of petroglyphs on the northeast corner of Paiute Rock. On the east-facing wall, just before the marker, there are two sheep and lots of curious lines. There is a large juniper tree on the corner, and hikers can duck between the tree and the wall to see the Scorpion, or they can walk around the tree and comes back under the branches from the other side. |
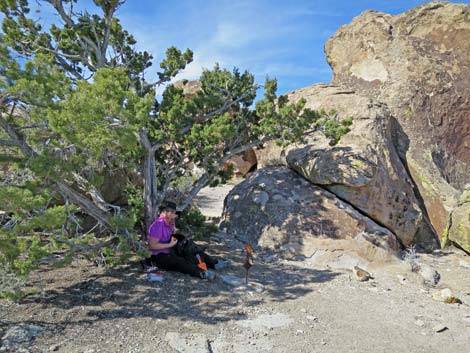 Hiker eating lunch in the shade by Marker #1 |
From Site 3, Site 4 is just ahead to the west on the backside of Paiute Rock. Site 4 includes the broad, north-facing wall split by a big crack. Petroglyphs are concentrated on the left half, but the right half has some interesting rock stories, including the use of incorporating natural cracks in the rock to create a story. From Site 4, the route passes between the rock wall and a tall but spindly juniper tree and stays to the right passing a break in the cliffs. Hikers can shortcut the loop by turning left and head up through the gap, coming out at Site 8 on the front-side of Paiute Rock. There are a few petroglyphs up in the gap. Site 5 is on the east-facing wall across the gap. Happy Man, to me, seems to be fly-fishing and laying out his catch (seven round trout) on the ground. There are some curious lines to the left of the fisherman. |
 Site 1: Atlatl Rock |
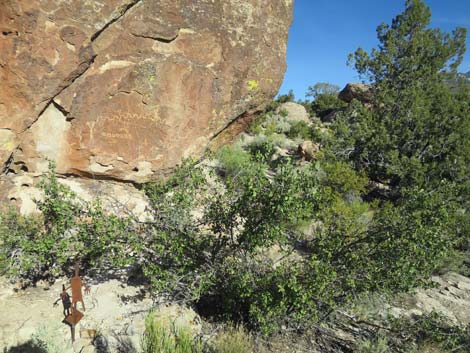
Continuing along the backside of Paiute Rock, the trail quickly arrives at Marker #6. This site is just around the corner from Site 5 and includes one, north-facing wall. Note that Marker #6 is loose, so it might move around or disappear. There is a sheep and some curiosities on the left side of a big, but spindly Serviceberry bush. The more interesting petroglyph is around past the bush. Hidden from view at the marker is a spectacular elk with grand antlers. There is another glyph that appears to be pioneer graffiti (the lines are too straight), and JFM marked the wall to the left. If you are going to do your initials, take more pride in your work than did JFM, curses to the lazy scoundrel on several counts! From the Grand Elk, hikers can continue up through the cleft in the rocks and come out on the other side of Paiute Rock, a bit to the right of Site 8. |
 Hiker at Site 1; trail starts and ends here (view N from Marker #1) |
Continuing along the backside of Paiute Rock, Marker #7 is just around the corner hidden by a Skunkbush from Marker #6. Site 7 is a small petroglyph panel that includes two old elk petroglyphs and one newer bighorn sheep petroglyph (the elk appear faded while the sheep is bright). Perhaps When humans first got here, they found more elk, but as the environment became more arid, they hunted more bighorn. From Marker #7, the trail continues west around the backside of Paiute Rock until hikers can turn left to circle around the west end of Paiute Rock. For people in a hurry, backtrack to Marker #6 and cut up through the rocks or scamper through the hole just past Marker #7; Marker #8 is to the left. |
 Trail from Site 1 to Site 2 (view N) |
Circling around the west end of Paiute Rock, the trail hugs the outside edge of the boulder pile, passing one small petroglyph, before curving back northward along the wall to Marker #8. The marker here is loose too, so it might wander around a bit. Site 8 includes a small panel with some curious rock stories, especially the one about the elephant-nosed bighorn. Note here that most of the petroglyphs are old and faded, but the bighorn is fresher. To the right, at the mouth of the cleft that comes up from Marker #5, there are some nice examples of sheep, including one fully formed and several in various states of creation. One full-bodied sheep seems to have no head, but actually the head is tiny with a dark dot forming the eye. On the other side of the cleft, several faint bighorn can be found on the corner. |
 Site 2; Marker #2 is missing (view W) |
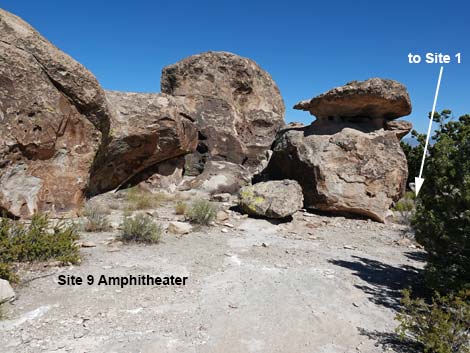
Passing the cleft, Logan Canyon Road comes into view, and the trail turns left into Site 9, the grand amphitheater where the back wall is thoroughly covered with a riot of rock stories. I can imagine seeing the elders here holding court with the back wall projecting voices out to the people in the open area. Continuing east between the rocks and the road, the trail passes a few more petroglyphs (there used to be some pioneer graffiti here) and arrives at the backside of the Site 1 boulder. The backside is as covered with petroglyphs as is the front-side, and Marker #1 is visible under the Juniper tree. Trailhead parking, a few yards away, is also clearly visible from this point. |
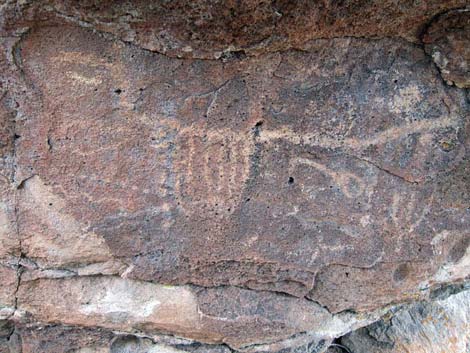
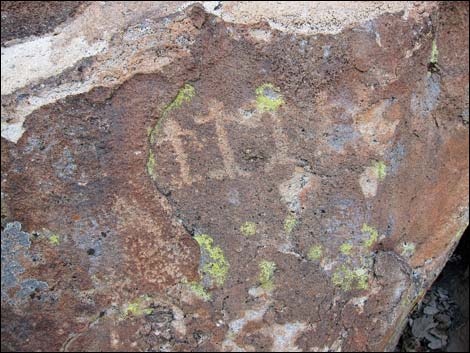 Site 2 petroglyphs: Happy family |
 Site 2 petroglyphs: Bighorn on a plate |
 Trail from Site 2 to Site 3(view N) |
 Site 3: petroglyphs on sunny wall and around the corner (view N) |
 Site 3 petroglyphs around the corner (view S) |
 Hikers can squeeze between tree and rock to Site 4 (view W) |
 Hikers can go around tree to Marker #4 (view W) |
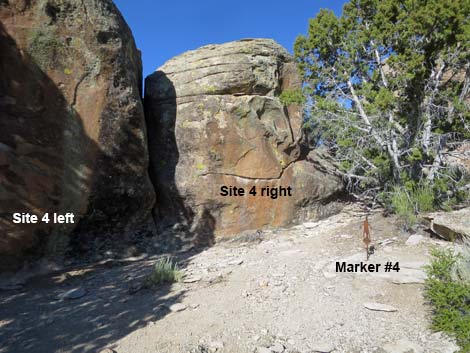 Arriving at Marker #4 (view NW) |
 Site 4, left wall (view SE from Marker #4) |
 Site 4 petroglyph details, left wall (view S) |
 Site 4, right wall (view S from Marker #4) |
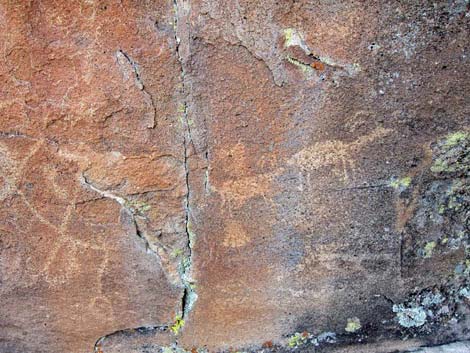 Site 4 petroglyph details, right wall (view S) |
 Going from Site 4 to Site 5 (view W) |
 Passing Marker #4 on the way to Site 5 (view W) |
 Marker #5 |
 Site 5 petroglyphs; Happy Fisherman (view W) |
 Continuing past Site 5 towards Site 6 (view W) |
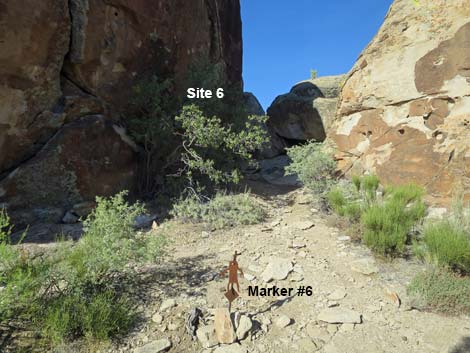 Marker #6; petroglyphs are on the shaded wall (view SW) |
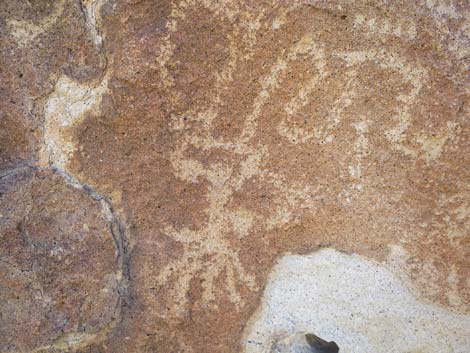
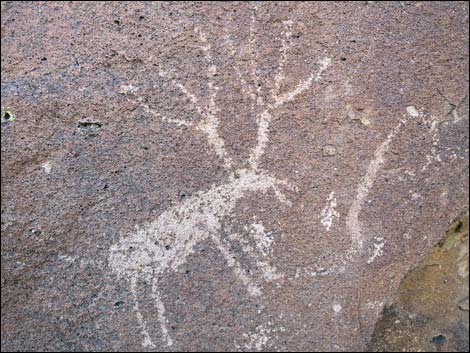 Site 6 Elk (view SE) |
 From Site 6, hikers can shortcut to Site 8 skipping Site 7 (view SW) |
 Continuing from Site 6 to Marker #7 (view NW) |
 From Marker #6, Marker #7 is visible through the bushes (view W) |
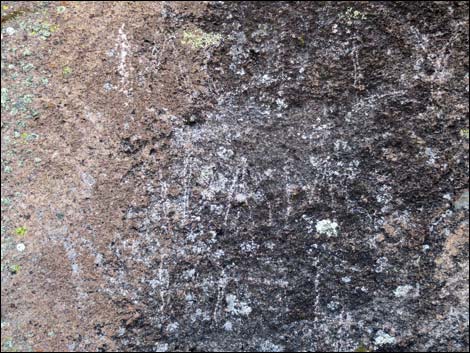
 Marker #7 and Site 7 petroglyphs: two elk and a bighorn (view S) |
 Continuing from Site 7 to Site 8 (view W) |
 Route continues along the south edge of Paiute Rock (view W) |
 Route turns left around the corner of Paiute Rock (view S) |
 Route runs along the south side of the boulders (view SE) |
 Passing marked boulders (view E) |
 Passing boulders (view SE) |
 Approaching Marker #8 (to the left; view E) |
 Turning left into Site 8 (view NE) |
 Site 8, left and center boulders (view NE) |
 Marker #8 at left boulder (view NW) |
 Site 8; left boulder petroglyphs (view N) |
 Site 8; center boulder (view N) |
 Site 8; center boulder petroglyphs (view N) |
 Site 8; right boulder (view S) |
 Site 8; right boulder petroglyphs (view NE) |
 Approaching Site 9 (view SE) |
 Approaching the Site 9 amphitheater (view E) |
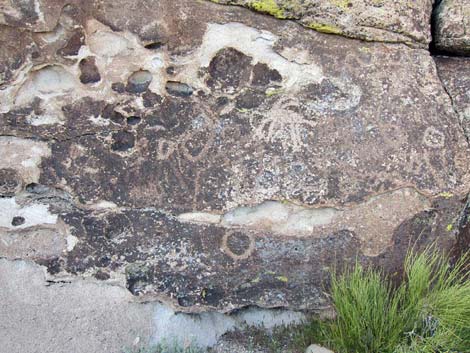
 Site 9: amphitheater of petroglyphs left (view N; Marker #9 missing) |
 Site 9 left: petroglyph details (view N) |
 Site 9: Amphitheater of petroglyphs, right (view N) |
 Site 9 right: petroglyph details (view N) |
 The trail continues along the rocks to Site 1 (view E) |
 Continues towards Site 1 (view E) |
 Site 9: Pioneer names in 2019 (view N) |
 Site 9: Pioneer names have been removed (view N) |
 Returning to Site 1 (view E) |
 Site 1 backside, details (view E) |
 Returning to Marker #1 and the trailhead (view SE) |
 Vandalism: don't be that guy |
Table 2. Hiking Coordinates based on GPS data (NAD27; UTM Zone 11S). Download Hiking GPS Waypoints (*.gpx) file.
| Waypoint | Comment | Easting | Northing | Elevation | Verified |
|---|---|---|---|---|---|
| PR-Register | Paiute Rock sign-in Register | 643672 | 4163163 | 5,605 | GPS |
| PR-01 | Paiute Rock Marker #1 | 643667 | 4163164 | 5,605 | GPS |
| PR-02 | Paiute Rock Marker #2 | 643670 | 4163176 | 5,604 | GPS |
| PR-03 | Paiute Rock Marker #3 | 643675 | 4163184 | 5,603 | GPS |
| PR-04 | Paiute Rock Marker #4 | 643665 | 4163188 | 5,606 | GPS |
| PR-05 | Paiute Rock Marker #5 | 643659 | 4163194 | 5,616 | GPS |
| PR-06 | Paiute Rock Marker #6 | 643649 | 4163196 | 5,617 | GPS |
| PR-07 | Paiute Rock Marker #7 | 643647 | 4163203 | 5,621 | GPS |
| PR-08 | Paiute Rock Marker #8 | 643640 | 4163184 | 5,630 | GPS |
| PR-09 | Paiute Rock Marker #9 | 643652 | 4163172 | 5,650 | Map |
PR = Paiute Rock
Happy Hiking! All distances, elevations, and other facts are approximate.
![]() ; Last updated 240323
; Last updated 240323
| Rock Art | Glossary | Copyright, Conditions, Disclaimer | Home |