Rock Art Around Las Vegas

Rock art is a precious resource. Please help protect and preserve these sites.
 Shaman Hill Sign-in Register |
Overview The Mt. Irish Archeological District is a large area with many boulder piles and low bands of cliffs covered with petroglyphs. Shaman Hill is the largest of the public petroglyph sites in the district and consists of many boulders and rock outcrops on the east end of a ridge. Native peoples etched an extensive array of nice petroglyphs into the rocks. The BLM placed eight numbered markers around the site, and the BLM and Lincoln County each produced brochures describing the numbered petroglyph panels (BLM brochure; Lincoln County brochure). The parking area between Shaman Knob and Shaman Hill is one of the better campsites in the area (see Shaman Knob). While visiting this site, please take care of the area and leave it as you found it for the enjoyment of future generations. Link to Site Map. |
 Marker style used at Shaman Hill |
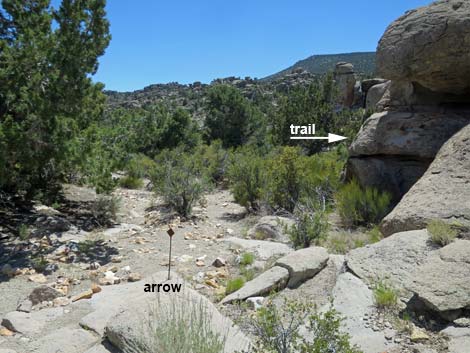
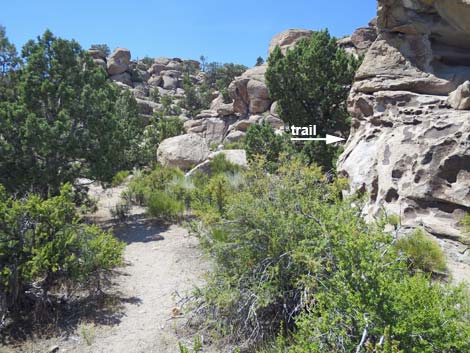
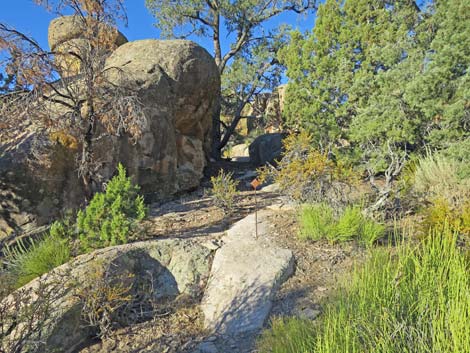
Location The Mt. Irish Archeological District is located in the Pahranagat Valley, about 110 miles north of Las Vegas. Details of the location, access routes, and GPS coordinates are presented on the Mt. Irish Archeological District page. The Hike From the Shaman Hill sign-in register (Table 1, Site SH-Register), the trail leads a few yards northwest towards Shaman Hill. As the trail passes between two large Utah Juniper trees and the view of Shaman Hill opens up, two small metal signs (directional arrows) on rebar posts become visible. The closer directional arrow is ahead to the left on the edge of the little wash. This sign marks the beginning of the Southbound Trail, which leads left down the wash to Sites 6-8. The other directional sign is ahead to the right near the base of the crags. The Northbound Trail starts there at Marker #1 and goes right, past the other second directional arrow, and follows the base of the crags to Sites 2-5. |
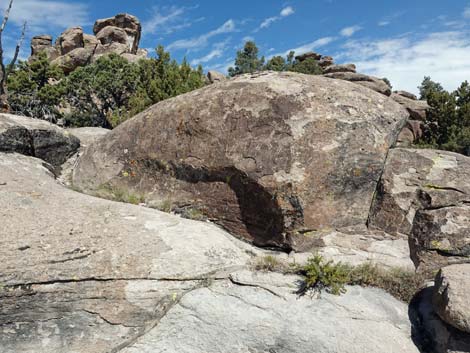
 Second Boulder (aka: Lizard Boulder) at Site 6 (view NW) |
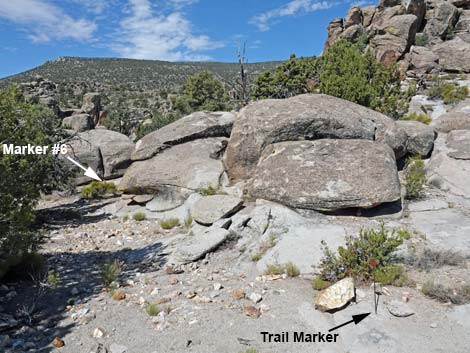
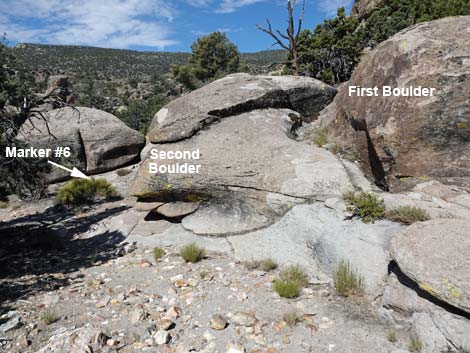
Turning left and heading south down the wash from the first directional arrow, Marker #6 immediately becomes visible in the wash at the base of the cliffs. While focused on Marker #6, it is easy to walk past First Boulder (aka: Bighorn Boulder) at Site 6 without noticing it. Marker #6 (Site SH-06) sits in front of Second Boulder (aka: Lizard Boulder) facing northwest such that hikers need to turn around to look back the read the number on the marker and see the petroglyphs. While looking back north, notice Bighorn Boulder behind Lizard Boulder and walk back the few steps to see the herd of bighorn petroglyphs charging across the cliffside. Continuing south down the wash past Marker #6, another directional arrow indicates that the trail continues straight down the wash. Shortly past the arrow, the trail passes a curiously dimpled rock-face on the right (with a nice bird petroglyph). Just past Dimpled Rock, and without a directional arrow, the trail turns right to head west through the bushes, still following the base of the cliffs. It is actually easier to walk south another few yards (just past the next bush, a big cliffrose), then turn right though bigger gaps in the bushes. |
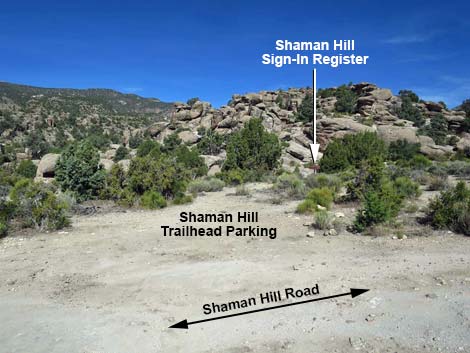 Shaman Hill trailhead parking (view W from Shaman Hill Road) Shaman Hill trailhead parking (view W from Shaman Hill Road) |
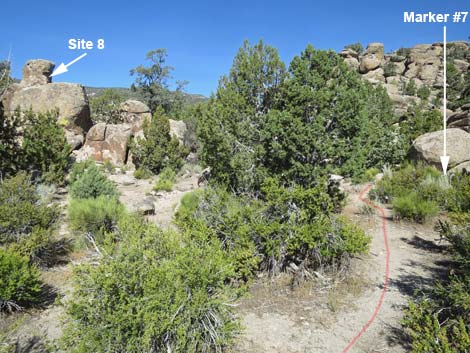
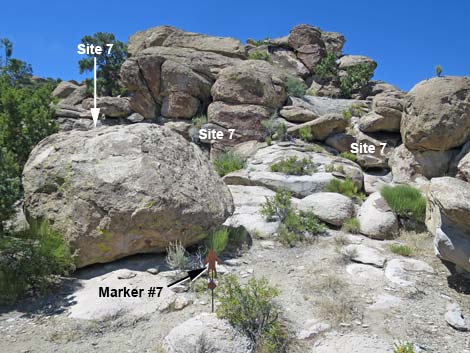
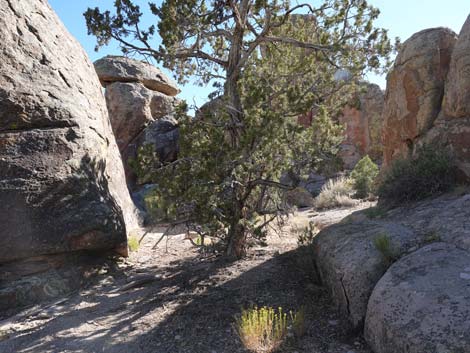
While passing Dimpled Rock, a large, rounded boulder becomes visible ahead on the right, and Marker #7 comes into view in front of the boulder. Standing at Marker #7 (Site SH-07) and facing the cliff-face (north), there are three petroglyph panels on the Site 7 wall. Most of the left panel is not visible from this view. Standing at Marker #7 and turning around, another directional arrow is visible to the southwest. This arrow directs hikers ahead into a narrow corridor between tall boulders. After ducking under the branches of two Pinyon Pine trees, hikers arrive at Marker #8 (Site SH-08) in an opening between rock piles. From Marker #8, the red wall ahead with bighorn sheep is the main petroglyph panel at Site 8. To the left, on the wall of the corridor near the second pine tree, there is another curious petroglyph. |
 Shaman Hill sign-in register (view W from Shaman Hill trailhead) |
The trail ends at Site 8, and hikers can simply follow their footprints in the dust back to the trailhead using the official trail. From Marker #8 or on the way back out through the Site-8 corridor (at the directional arrow) consider turning east through gaps in the Corridor Wall and following along the base of the East-Facing Wall. There are curious rock stories all along the East-Facing Wall out to the south end of the wall. Walking north along the wall brings hikers back to Site 7 and the trail back to the trailhead. |
 Sign-in register (view NW towards directional arrow signs) |
 First directional arrow; Trail South runs down wash (view NW) |
 First directional arrow; Trail South to the left (view NW) |
 Marker #6 is visible from the first directional arrow (view S) |
 Approaching First Boulder (Site #6; view SW) |
 First Boulder (aka: bighorn boulder; view NW) |
 First Boulder (aka: bighorn boulder; view NW) |
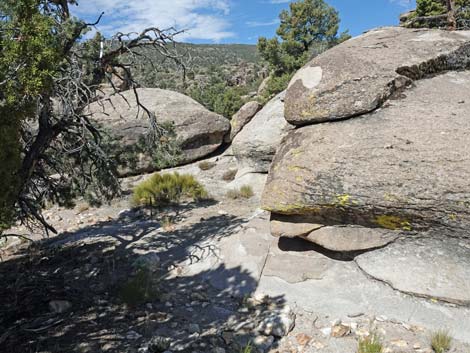 Approaching Second Boulder (Site #6; view SW) |
 Arriving at Second Boulder (Site #6; view SW) |
 Site 6: First and Second Boulders (view N) |
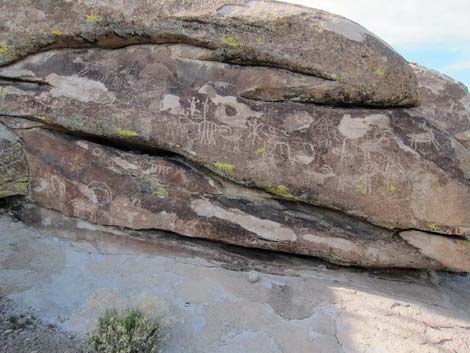 Second Boulder (aka: lizard boulder; view NW) |
Two lizards, a coyote, bighorn sheep, ... and a bird? |
 From Marker #6, the next directional arrow is visible (view S) |
 Approaching second arrow (view S) |
 Second arrow: continue straight ahead (view S) |
 Trail turns right past dimpled cliff (view S) |
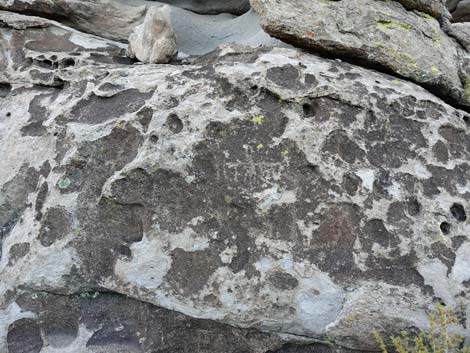
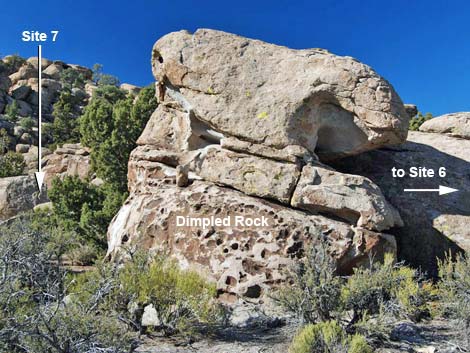 Dimpled Rock (view W) |
 Bird petroglyph on Dimpled Rock (view N) |
 Bird petroglyph on Dimpled Rock (evening light; view N) |
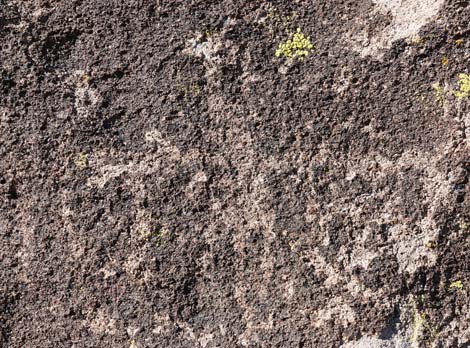 Bird petroglyph on Dimpled Rock (afternoon light; view N) |
 Bird petroglyph on Dimpled Rock (evening light; view N) |
 Trail turns right, wrapping around the dimpled cliff (view W) |
 Going to Site 7, note that Site 8 is behind a rock wall (view SW) |
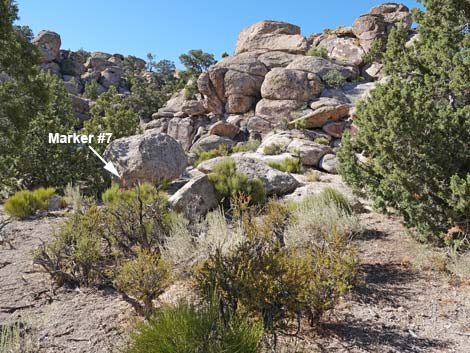 Marker #7 comes into view (view NW) |
 Approaching Marker #7 (view NW) |
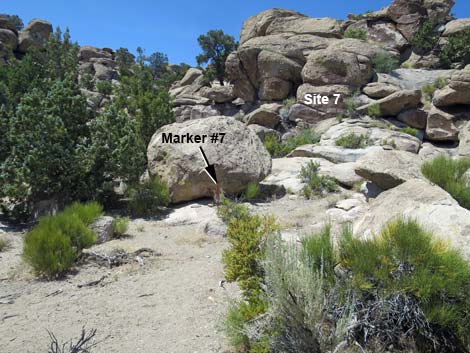
 Arriving at Marker #7 (view NW) |
 Center panel at Site 7 (view NW) |
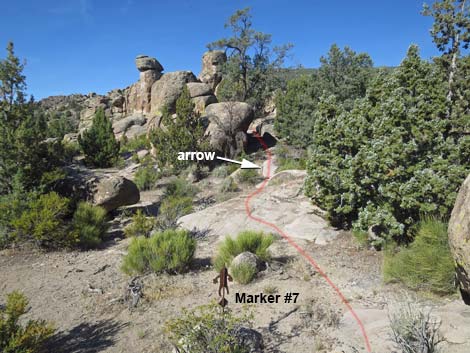 From Marker #7, directional arrow is visible (view SW) |
 Directional arrow leads hikers into the corridor (view SW) |
 Arrow directs hikers into a corridor (view SW) |
 Directional arrow (view SW) |
 First of the Pinyon Pine trees (view SW) |
 Second Pinyon Pine trees (view SW) |
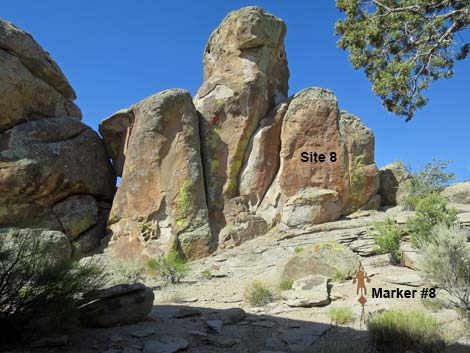 Arriving in an opening at Marker #8 (view S) |
 Upper part of main petroglyph panel at Site 8 (view S) |
 From Marker #8, hikers can exit through a gap in the wall (view E_ |
 East-Facing Wall (view N towards Site 7) |
 Petroglyphs (view W) |
 East-Facing Wall (view N towards Site 7) |
 Petroglyphs (view W) |
Table 1. Hiking Coordinates based on GPS data (NAD27; UTM Zone 11S). Download Hiking GPS Waypoints (*.gpx) file.
| Waypoint | Location | Easting | Northing | Elevation | Verified |
|---|---|---|---|---|---|
| SH-Register | Shaman Hill Sign-in Register | 643186 | 4163241 | 5,736 | GPS |
| SH-06 | Shaman Hill Marker #6 | 643166 | 4163230 | 5,723 | GPS |
| SH-07 | Shaman Hill Marker #7 | 643145 | 4163216 | 5,721 | GPS |
| SH-08 | Shaman Hill Marker #8 | 643120 | 4163189 | 5,740 | GPS |
SH = Shaman Hill
Happy Hiking! All distances, elevations, and other facts are approximate.
![]() ; Last updated 240323
; Last updated 240323
| Shaman Hill | Rock Art | Glossary | Copyright, Conditions, Disclaimer | Home |